
A Bill records what a vendor has charged you — usually tied to a Purchase Order, or entered on its own for expenses with no PO. For inventory items, entering the bill is also how the goods are received: saving it creates the inventory lots, and updates the PO’s received quantities. If received goods turn out to be dead or defective, you can send them back from the bill; see Vendor Returns.
Where to Find Bills #
Open a vendor and click its Bills tab for that vendor’s bills, or choose Bills from the main menu (Bills Overview) to see them all. Global Find searches bills too.
The Bill List #
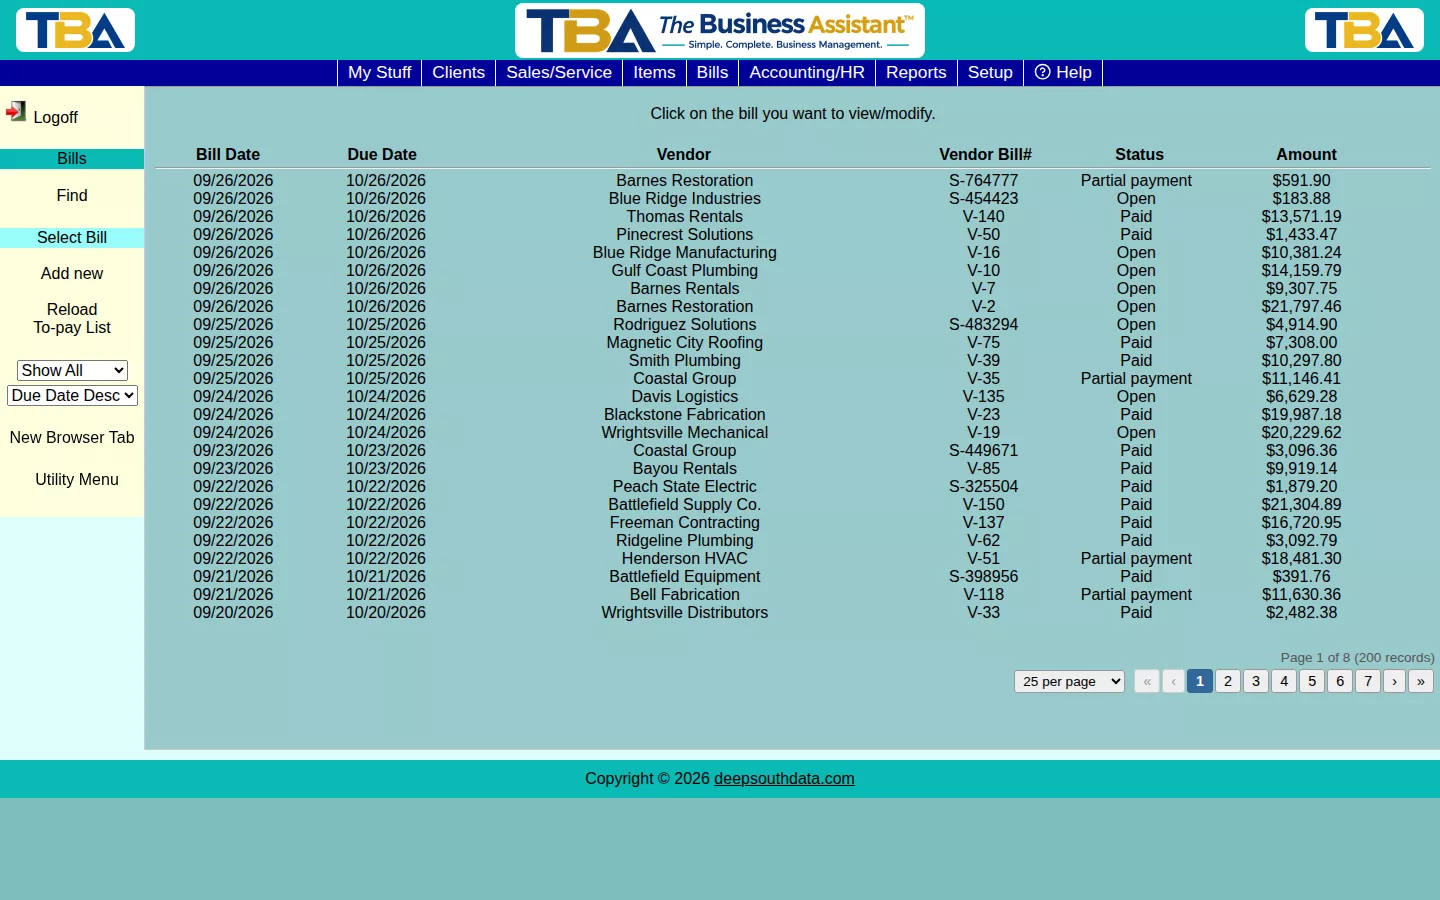
Columns: Bill Date, Due Date, Vendor, Vendor Bill#, Status, and Amount. Click a bill to open it. The sidebar has:
- Add new and Find.
- Status filter — Show All, Open/Partial (unpaid or part-paid), or Paid.
- Sort — Due Date or Bill Date, ascending or descending.
- Reload To-pay List — reopens the Bills to Pay batch dialog, described next.
Bills to Pay #
When you open the bill list, TBA can show Bills to Pay: every unpaid bill across all your vendors, so you can pay several at once. It is described in full under Bill Payments. Here is how the list itself works:
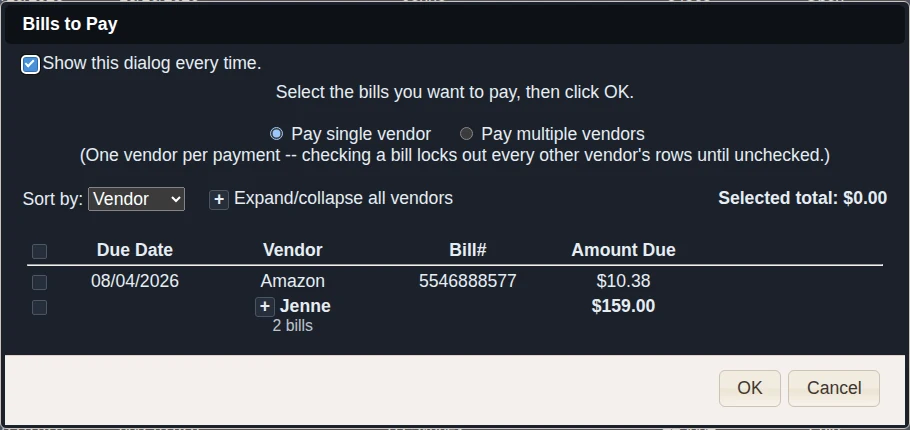
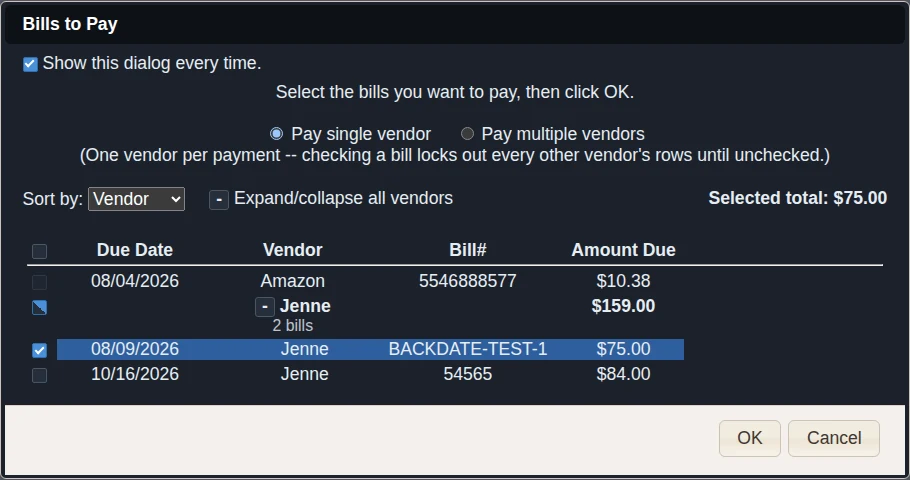
- Grouped by vendor. A vendor with two or more unpaid bills gets one summary row: a +/− box to expand or collapse, the vendor name, the number of bills (for example 3 bills), and the combined Amount Due. A vendor with only one bill shows just that bill, with no box. Vendors start collapsed.
- Expand/collapse all vendors — a box beside the sort control opens or closes every vendor at once. It appears only when at least one vendor has several bills.
- Sort by — Vendor (the default; groups each vendor’s bills together) or Due Date (a flat list, oldest first, with no grouping).
- Checkboxes — each bill has one, and each vendor summary row has a box that ticks all of that vendor’s bills (it shows a half-filled box when only some are ticked). The box beside the column headings is select all. Under Pay single vendor, ticking a bill disables every other vendor’s boxes until you untick back to none.
- Columns — Due Date, Vendor, Bill# (the vendor’s reference number), and Amount Due. Selected total at the top adds up everything ticked.
- Show this dialog every time — untick to stop it opening on each visit; the sidebar link always brings it back.
Finding a Bill #
Fill in any of: All text fields, Vendor name, Vendor Bill #, Bill date from / to, and Open or Partial payment only. An ID search also finds bills by an item or unit ID on a line.
The Bill Page #
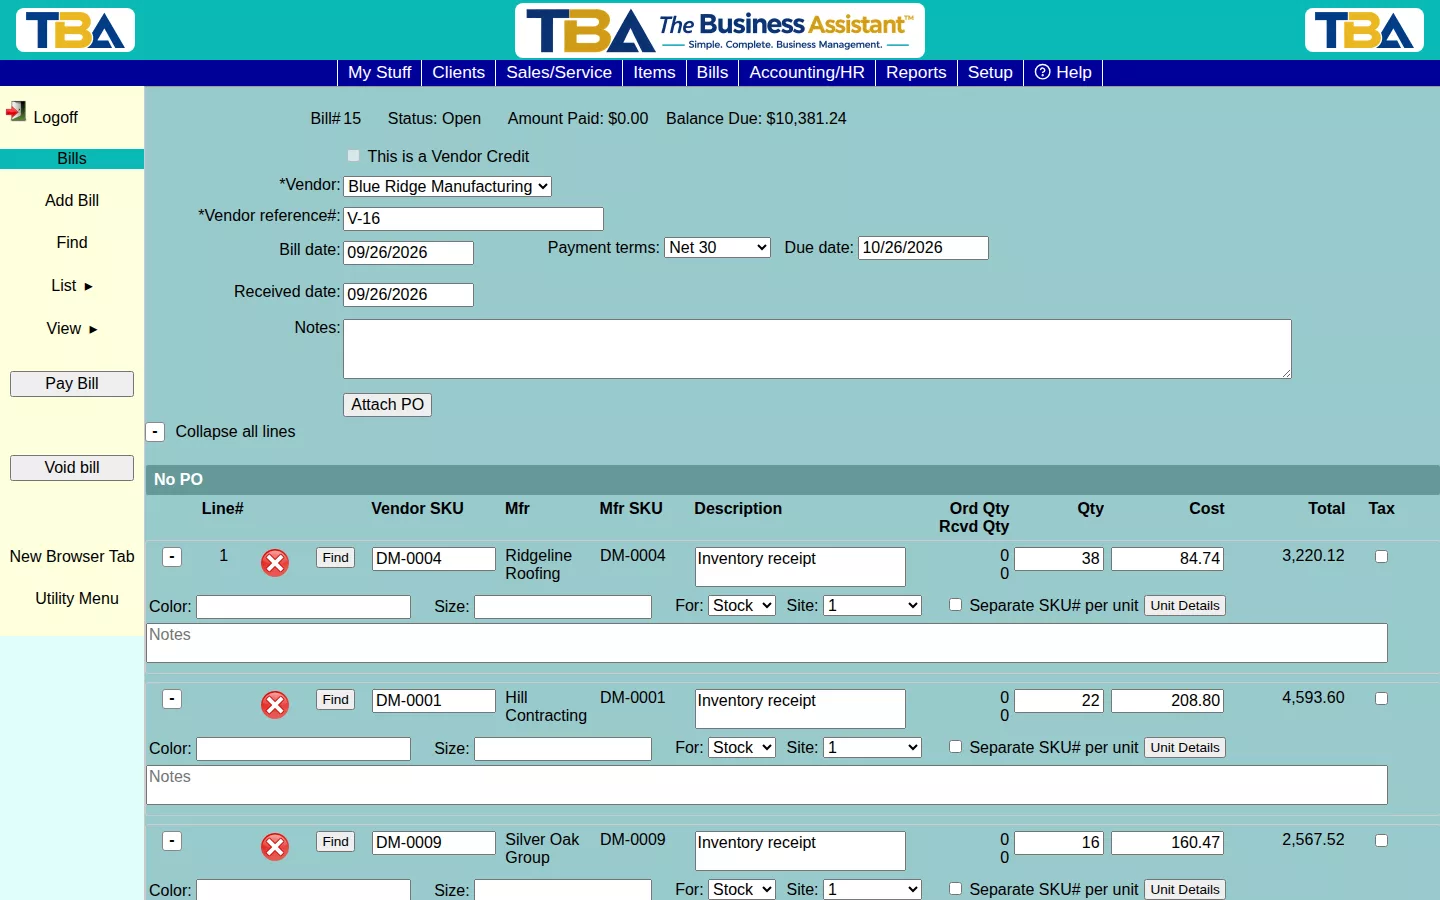
Header Fields #
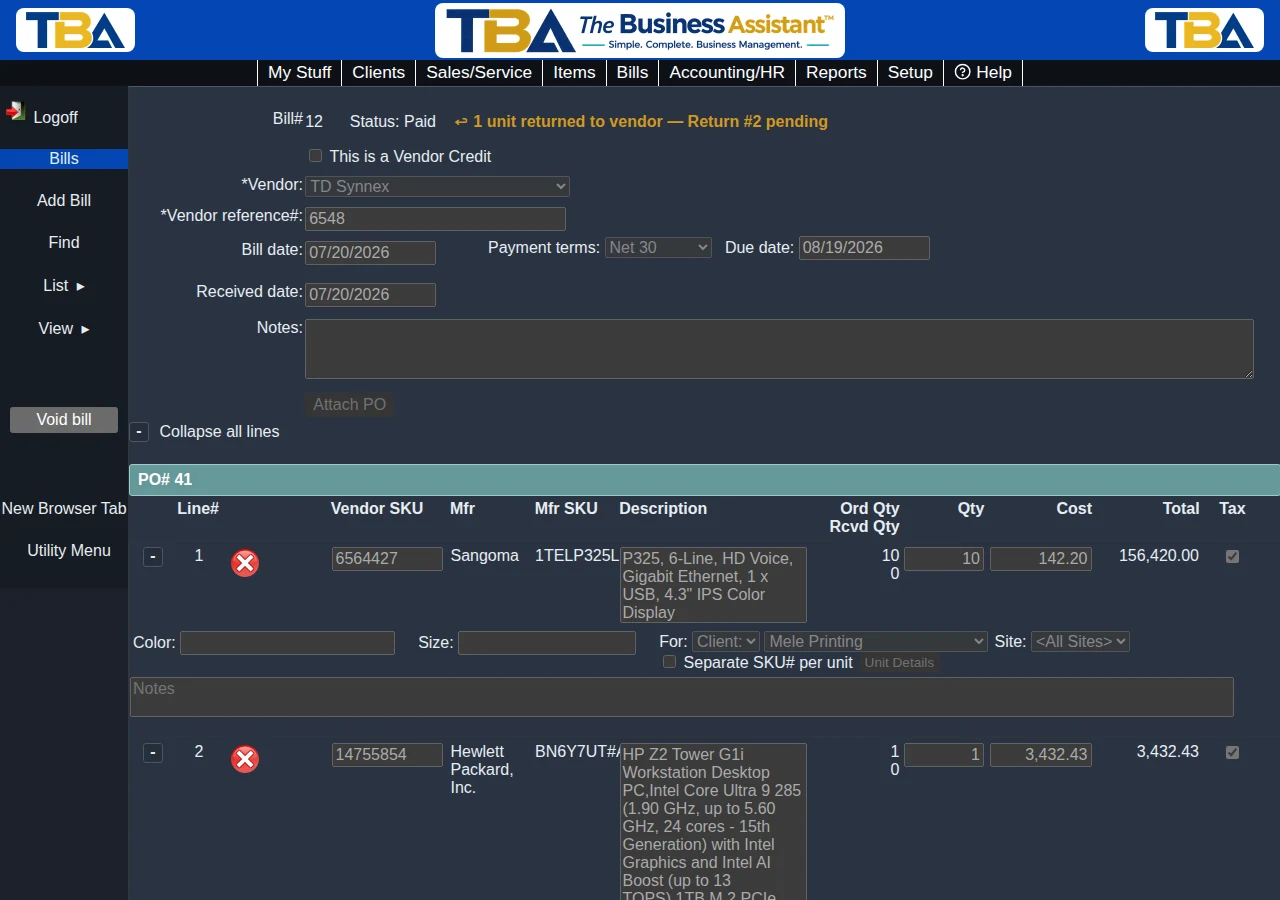
- Bill# — assigned by TBA when you save (a new bill shows <new>).
- Status — updated automatically as you pay. Statuses are Open, Partial payment, Paid, and Voided. (The amount paid and balance due are at the bottom of the page, under the totals.)
- Return notice — appears next to Status when goods have been sent back to the vendor against this bill, for example ↩ 1 unit returned to vendor — Return #2 pending. It shows the total units returned and each return’s state, and turns green with a check mark once the returns are completed (credited or replaced). Click it to open View Returns. See Vendor Returns.
- This is a Vendor Credit — tick to record a credit from a vendor instead of a charge. See below.
- Vendor (required) — choose with Find, or add a new one on the spot.
- Vendor reference# (required) — the number on the vendor’s invoice. (On a vendor credit this is labeled Credit#.)
- Bill date and Received date — the date on the vendor’s invoice, and the date the goods arrived. The received date is the date new inventory lots get.
- Payment terms and Due date — terms default from the vendor (see Payment Terms Setup) and set the due date.
- Notes.
- Attach PO — lists the vendor’s open purchase orders. Pick one to pull its lines onto the bill, with the quantity ordered and the quantity still due. You can attach more than one PO to a single bill.
Line Items #
Lines are grouped under a heading for each attached PO (PO# 1885), or No PO. Each line has: Vendor SKU, Mfr and Mfr SKU, Description, Ord Qty and Rcvd Qty (PO lines only), Qty, Cost, Amount, and Taxable. A second row holds GL account, Color, Size, For (the client or site the item is being received for), Unit Details, and Notes. Use Find to choose an item, the arrows to reorder, delete to remove, and collapse to show each line on one row. Use Collapse all lines above the lines for all of them at once.
- Ord Qty / Rcvd Qty — the quantity ordered on the PO line, and the quantity received before this bill. Units you later send back to the vendor are taken into account, so Rcvd Qty doesn’t go negative after a return.
- Other expense lines — in the Find dialog, choose a GL account instead of an item to bill an expense with no inventory item, such as rent or utilities. The line debits that account, and its description defaults to the account name.
- Unit Details — for a received inventory line, capture each unit’s serial number and warranty data now, or finish it later on the item’s inventory record. Once received, each real unit has its own block.
- Over-receiving — if you enter more than a PO line still has open, TBA warns you, but lets you save, since vendors sometimes ship extra.
- Return note — a line whose units were sent back shows a note under it, such as ↩ 1 returned to vendor — Return #2 pending (green with a check mark when completed). Click it for View Returns.
Totals #
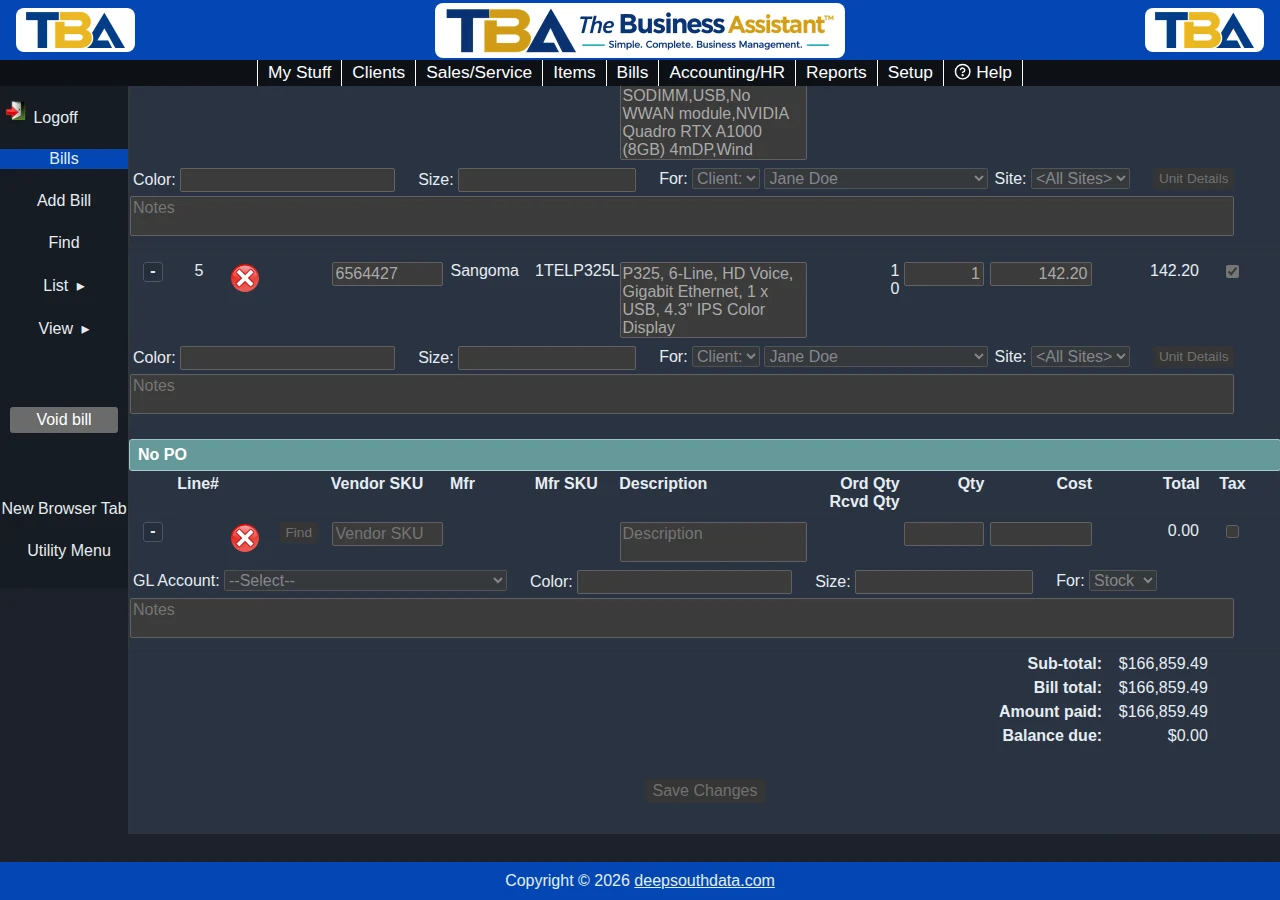
At the bottom of the page: Sub-total, Bill total, and, on a saved bill, Amount paid and Balance due (updated automatically as you pay). Click Save Changes to save; saving posts the bill to your books (payables and the expense or inventory accounts).
Vendor Credits #
Tick This is a Vendor Credit to record a credit from a vendor instead of a charge — it reduces what you owe them rather than adding to it. You enter the amounts as positive dollars, and TBA handles the sign. The label changes to Credit# and Credit total, and Attach PO is unavailable. When you record the vendor’s credit memo for a return, TBA creates a vendor credit like this for you.
Sidebar Actions #
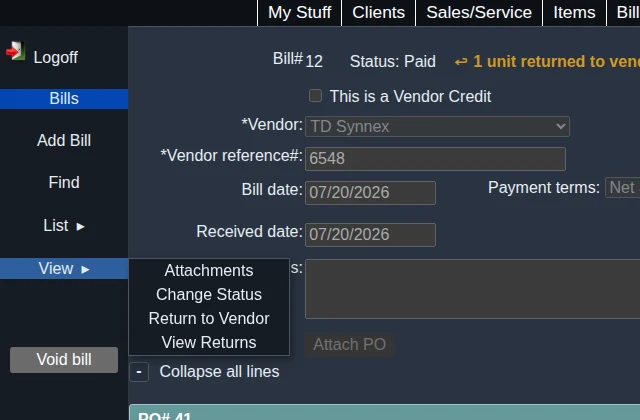
- View → Attachments — see Attachments and Pictures.
- View → Change Status — for users with permission, set the status by hand to Open, Partial payment, or Paid (for example for a bill settled outside TBA). Voiding is only done through Void bill.
- View → Return to Vendor — send received units back to the vendor (DOA, defective, wrong item). Shown on a saved bill that is not voided and not a vendor credit. Needs the Vendor Returns permission. The dialog and what it does are in Vendor Returns.
- View → View Returns — appears once the bill has had a return. A list of every return on this bill (return #, date, status, RMA #, units, amount at cost); click one for its detail, including serial numbers, and a link to its vendor credit if one was booked.
- Pay Bill — record a payment against the bill; see Bill Payments.
- Void bill — reverses a bill that should never have been entered. If the bill’s receipt left inventory lots in stock, TBA asks whether to keep those lots or archive them. A bill with a return against it (other than a cancelled one) can’t be voided; cancel the return, or void its vendor credit, first.
Related #
What you owe each vendor, by age, is on AP Aging. For payments with no bill, use Quick Payment. To send goods back, see Vendor Returns.
On a Phone #
The Bill page has a phone layout: header fields stacked, each line as a card with its collapse button, and the totals below. The Bills to Pay dialog shows each bill as a card (due date, vendor, bill number, amount due), with vendor summary rows for vendors with several bills, and the Bill List also fits the screen. The return dialogs fit the screen as well. See Using TBA on Your Phone.


