
Purchase Orders (POs) are how you order stock or supplies from a vendor. When the goods arrive, you enter the vendor’s Bill against the PO, and that is what receives the items into Inventory — there is no separate receiving step to remember. If received goods turn out to be defective, you can send them back; see Vendor Returns.
The PO List #
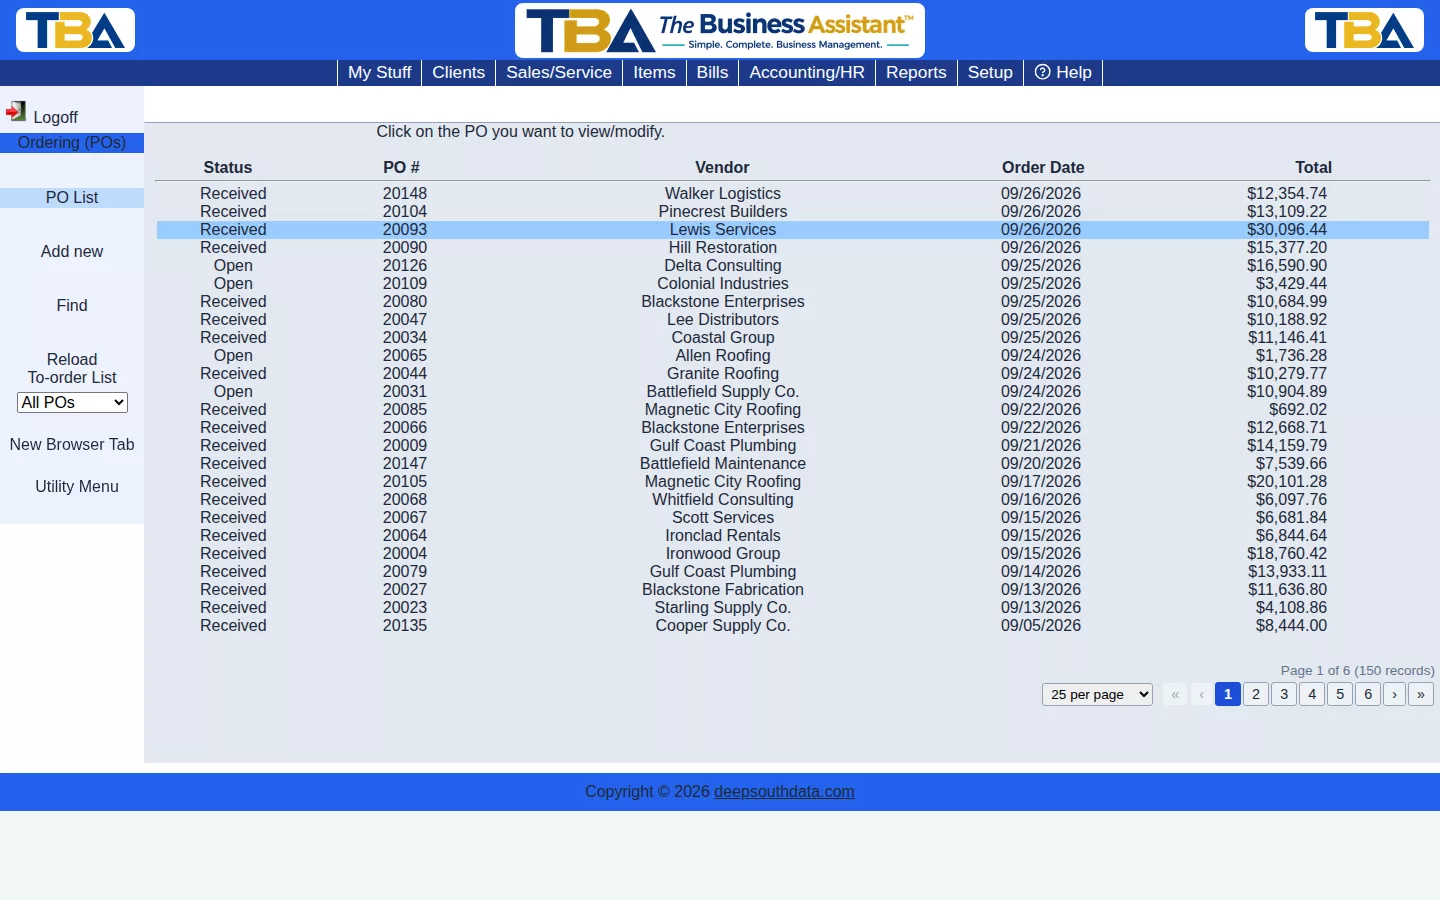
Columns: Status, PO #, Vendor, Order Date, and Total. Click a PO to open it. The sidebar has:
- Add new — start a blank PO. Opened from a vendor, the vendor is filled in for you and its standard payment terms are applied.
- Find — search by all text fields, PO #, vendor name, or order date.
- Status filter — All POs, Open/Partial, or Received.
- Reload To-order List — reopens the Items to Order dialog.
- New Browser Tab.
Items to Order #
When you open the PO list, TBA can show Items to Order: everything in your company that needs to be purchased but isn’t on a PO yet. It is a check-list. Each row shows:
- Checkbox — tick the rows you want on a PO. The box above the list ticks or clears every row.
- Qty — how many to order.
- Mfr and Mfr SKU — the manufacturer and the manufacturer’s part number. TBA treats every vendor’s item record for the same manufacturer part as the same product.
- For — the client the item is being ordered for, or blank for stock.
- Source — where the need came from, such as SO #77, line 2.
- Vendor — the vendor that sells the part. If only one vendor does, it is filled in. If more than one does, choose from the drop-down; the row is marked until you do.
There are three kinds of row:
- Special-order lines on a Sales/Service Order that are waiting to be ordered for a client.
- Special-order lines on an Invoice, the same idea.
- Stock shortages — inventory items whose on-hand plus on-order quantity has fallen below the Minimum you set on the item.
Click OK. TBA opens a new PO per vendor with those lines filled in. Nothing is saved until you review it and click Save. Untick Show this dialog every time if you don’t want it on each visit; the sidebar link always brings it back. A long list scrolls inside the dialog, so the title and the OK and Cancel buttons always stay on the screen. Names with apostrophes, such as St. Margaret’s Nursing Home, display correctly.
The PO Page #
Header Fields #
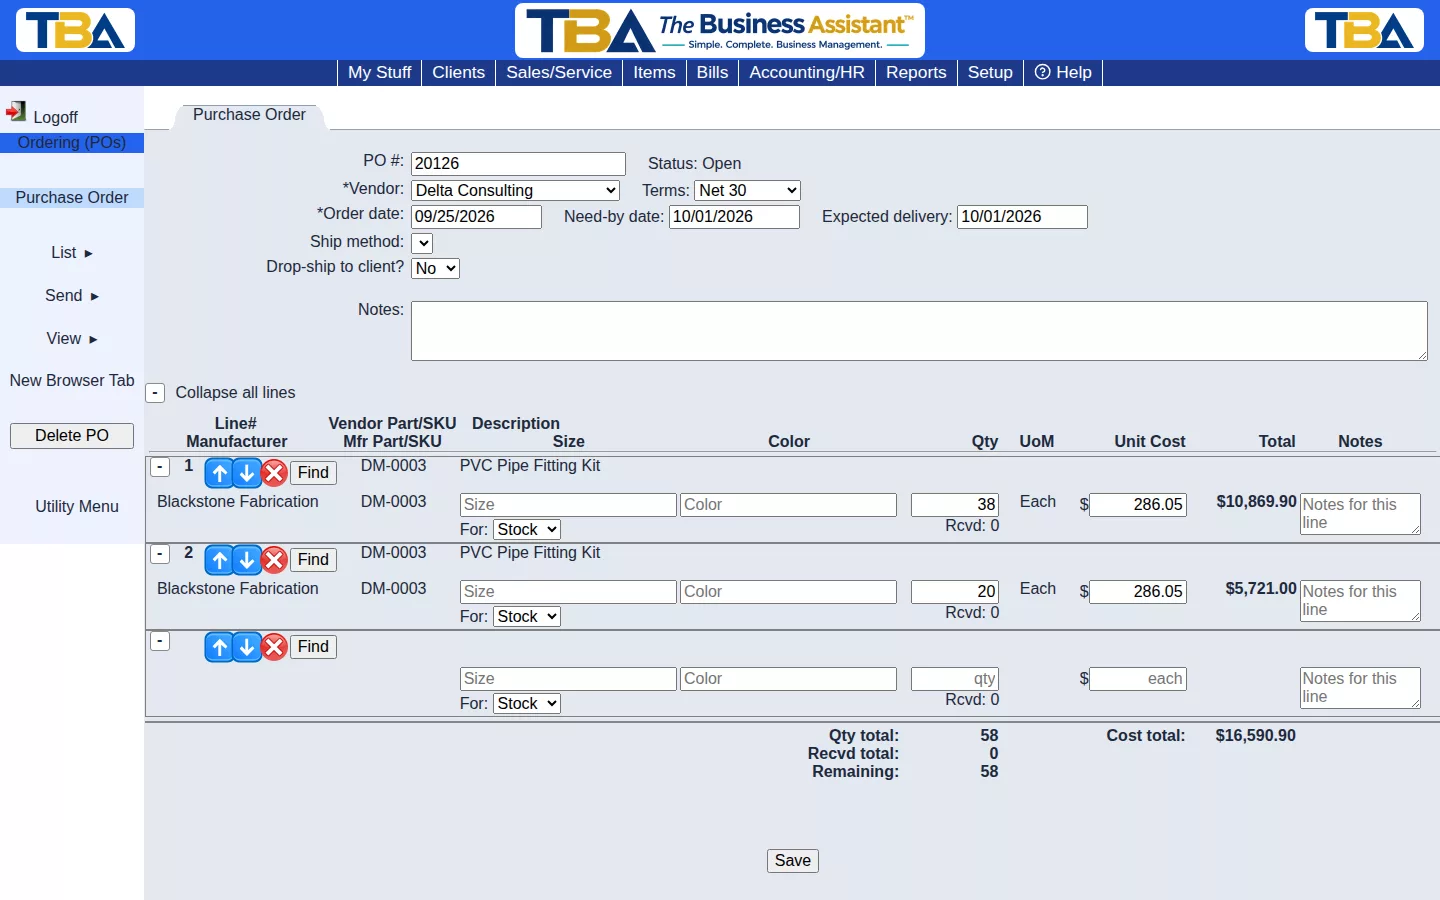
- PO # — assigned when you save (see Next Numbers to Assign).
- Status — see below.
- Vendor (required) — choose with Find, or add a new vendor on the spot.
- Terms — payment terms, filled in from the vendor’s standard terms (see Payment Terms Setup).
- Order date (required), Need-by date, and Expected delivery.
- Ship method — how the vendor will send it; choices come from Shipping Methods.
- Site — which site the goods are for (shown only if you have two or more).
- Drop-ship to client? — choose Yes when the vendor should ship directly to your client. Select the client, then pick one of their shipping addresses (or add one): Ship-to location, Address, City, State, and ZIP.
- Notes — printed on the PO.
Line Items #
Each line has the Vendor Part/SKU, Description (the item’s ordering description), Manufacturer, Mfr Part/SKU, Size, Color, Qty, UoM, Unit Cost, Total, and Notes. Use Find to pick an item, the arrows to reorder, the delete button to remove a line, and the collapse buttons to show each line on one row. Two extras:
- For — the client the line is being ordered for, if any.
- Sales Order Line — once a client is chosen, you can link the line to that client’s open special-order line, so when the goods arrive, TBA knows the special order has been received. Make this link whenever you order for a client’s special order: it lets TBA match the received item to the order, which keeps the Items to Invoice list from offering the same unit twice.
Totals at the bottom: Qty total, Cost total, Recvd total (received so far), and Remaining.
Statuses #
- Open — ordered, nothing received yet.
- Partial — some but not all quantities received. A PO can be received in several shipments.
- Received — everything received.
- Closed — won’t be completed, but should be treated as finished.
- Cancelled — no longer being ordered.
Open, Partial, and Received update themselves as bills are entered against the PO. They also move back when units are returned to the vendor: a Vendor Return reduces the line’s received quantity, so a fully Received PO becomes Partial (or Open) again until the replacement is received. If a client cancelled their special order, the return also reduces the line’s ordered quantity so nothing more is expected. Users with the PO status permission can also use Change Status to set any of the five by hand. Be aware that a manual change only changes the header; it does not change the received quantities on the lines, so the two can disagree.
Sidebar Actions #
- List → PO List / List Previous Find.
- Send → Print/Download — makes a PDF of the PO.
- Send → Email PO — choose recipients (the vendor’s emails and contacts, or your own), then edit the subject and message before sending. Recorded in the Email Log.
- View → Attachments / Communications / Status Changes — see Attachments and Pictures, Vendor Communications, and the history of status changes with who made them.
- Refresh Data — reloads the lists on the page (vendors, terms, ship methods) after you’ve added one elsewhere.
- Delete PO — permanently removes the PO.
On a Phone #
The PO page has a phone layout: header fields stacked, each line as a card (collapsible), and running totals for quantity, cost, received, and remaining. In the Items to Order dialog each row is a card (manufacturer and quantity on top, then SKU, client, source, and the vendor drop-down at full width) with a larger checkbox. The PO list also fits the screen. See Using TBA on Your Phone.


