
Vendors are the companies you buy from — suppliers, manufacturers, and subcontractors. The same vendor record is used both as a Manufacturer on an Item and as the Vendor you actually purchase from, since those are sometimes the same company and sometimes not.
Where to Find Vendors #
Reach Vendors from the Items or Bills tile menus (see Items Overview and Bills Overview), or the top navigation bar under either section. Global Find searches vendors too.
The Vendor List #
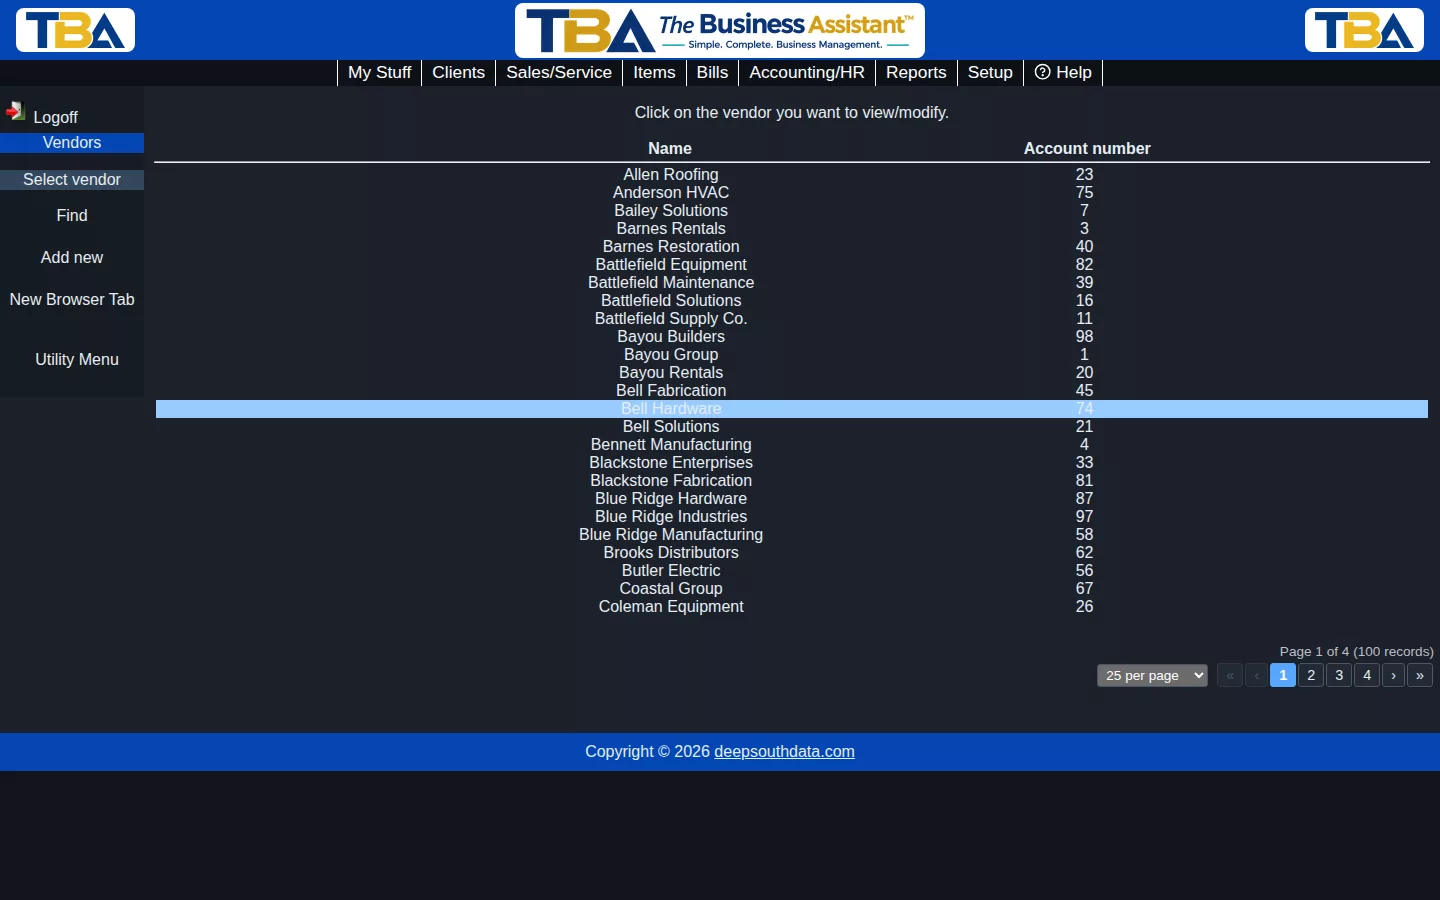
The list shows each vendor’s Name and Account number (your account number with them). Click a vendor to open it. The sidebar has Add new, Find, and New Browser Tab.
Finding a Vendor #
Fill in any of: All text fields, Name, Phone number, Email, or Web page. Searching is not case sensitive, and you can enter just part of a name. List All in the sidebar shows every vendor.
Vendor View #
Opening a vendor puts you in a tabbed workspace, similar to a client’s Client View: Vendor, Purchase Orders, Bills, Payments, People, and Comms — everything related to that vendor in one place.
- Purchase Orders — POs placed with this vendor; see Purchase Orders.
- Bills — bills received from this vendor; see Bills.
- Payments — payments you’ve made to this vendor; see Bill Payments.
- People — your contacts at this vendor, same as a client’s People tab.
- Comms — a log of calls, emails, and meetings with this vendor; see Vendor Communications.
The Vendor Tab #
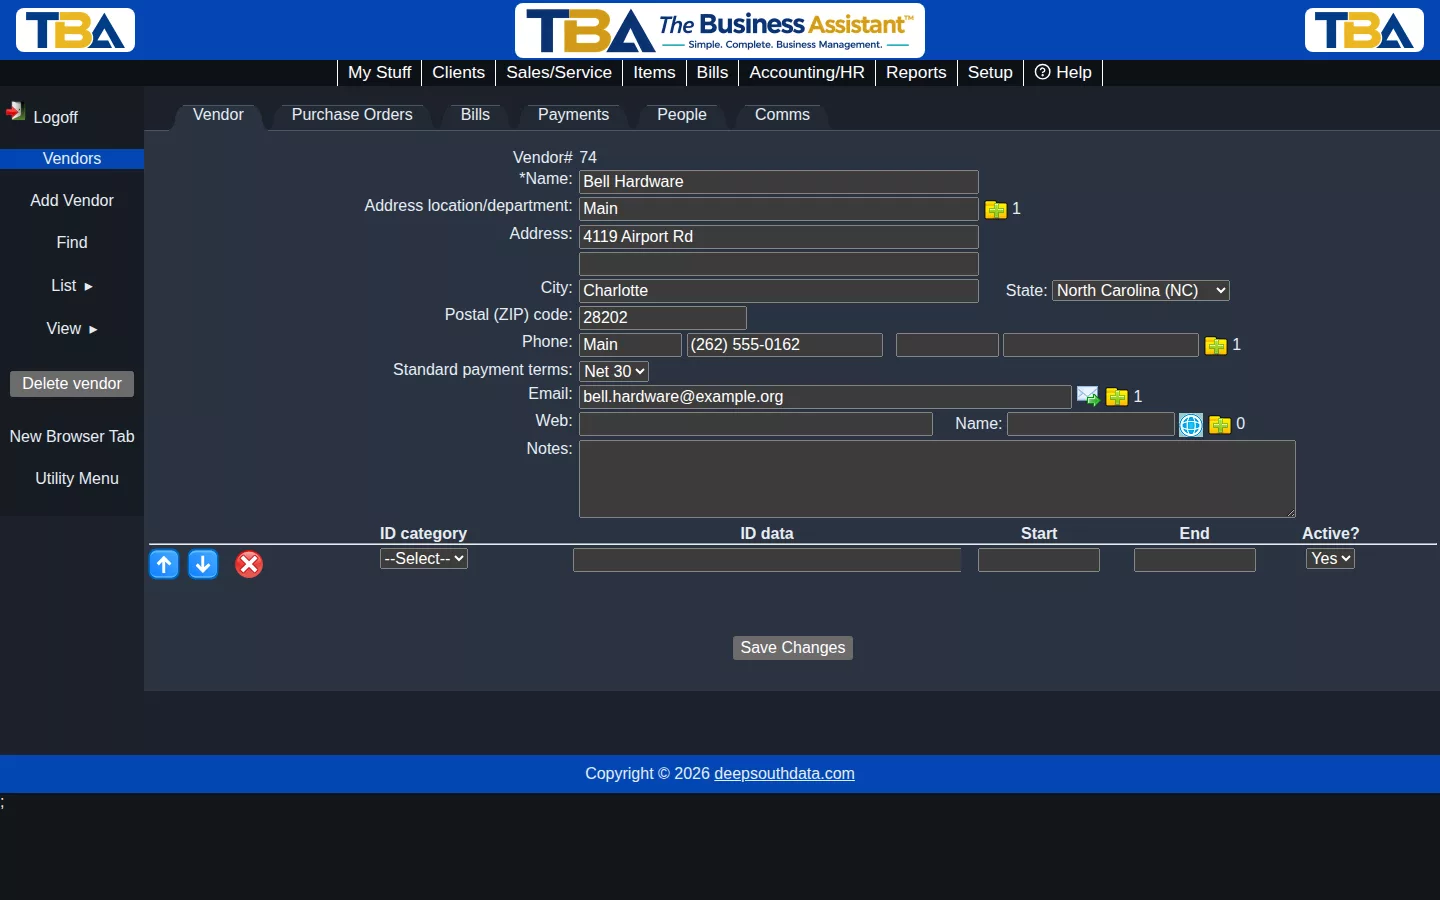
- Vendor# — assigned by TBA when you save (see Next Numbers to Assign).
- Name (required) — the vendor’s business name.
- Address location/department — a label for the main address, such as “Headquarters” or “Returns Dept.”
- Address, City, State, Postal (ZIP) code — the main address. A vendor can have more than one: use the folder-with-plus icon to open Vendor Addresses, where you can add, edit, or delete addresses (each with a Location label such as home or work).
- Phone — two numbers can be entered directly, each with a short label. The folder icon opens the full list so you can keep as many as you want; the count appears next to it.
- Standard payment terms — the default terms (for example Net 30). New bills from this vendor use it automatically, though it can be changed per bill. Terms are defined in Payment Terms Setup.
- Email and Web — each can have a short label (for example “Orders”) and, like phone, more than one entry.
- Notes — anything you want to remember about the vendor.
- ID category / ID data / Start / End / Active? — extra identifiers you track for a vendor, such as your account number with them, a license, or an insurance certificate. Choose a category (the choices come from Vendor ID Categories), enter the number or text, optional start and end dates (handy for expiring certificates), and untick Active when it no longer applies.
Click Save Changes to save.
Sidebar #
- List → Vendor List or List Previous Find — return to the list or to your last search results.
- View → Attachments — add files or photos to the vendor; see Attachments and Pictures.
- View → Tax Info — the vendor’s 1099 status and taxpayer ID; see Vendor Tax / 1099.
- Delete vendor — removes the vendor along with its addresses, phone numbers, emails, IDs, and tax info. Only available to users with permission to delete vendors (see Users and Permissions).


