
Bill Payments records money you’ve paid to vendors against their Bills, and tracks the history of every payment made. Saving a payment posts it to your books and reduces what you owe.
The Payment List #
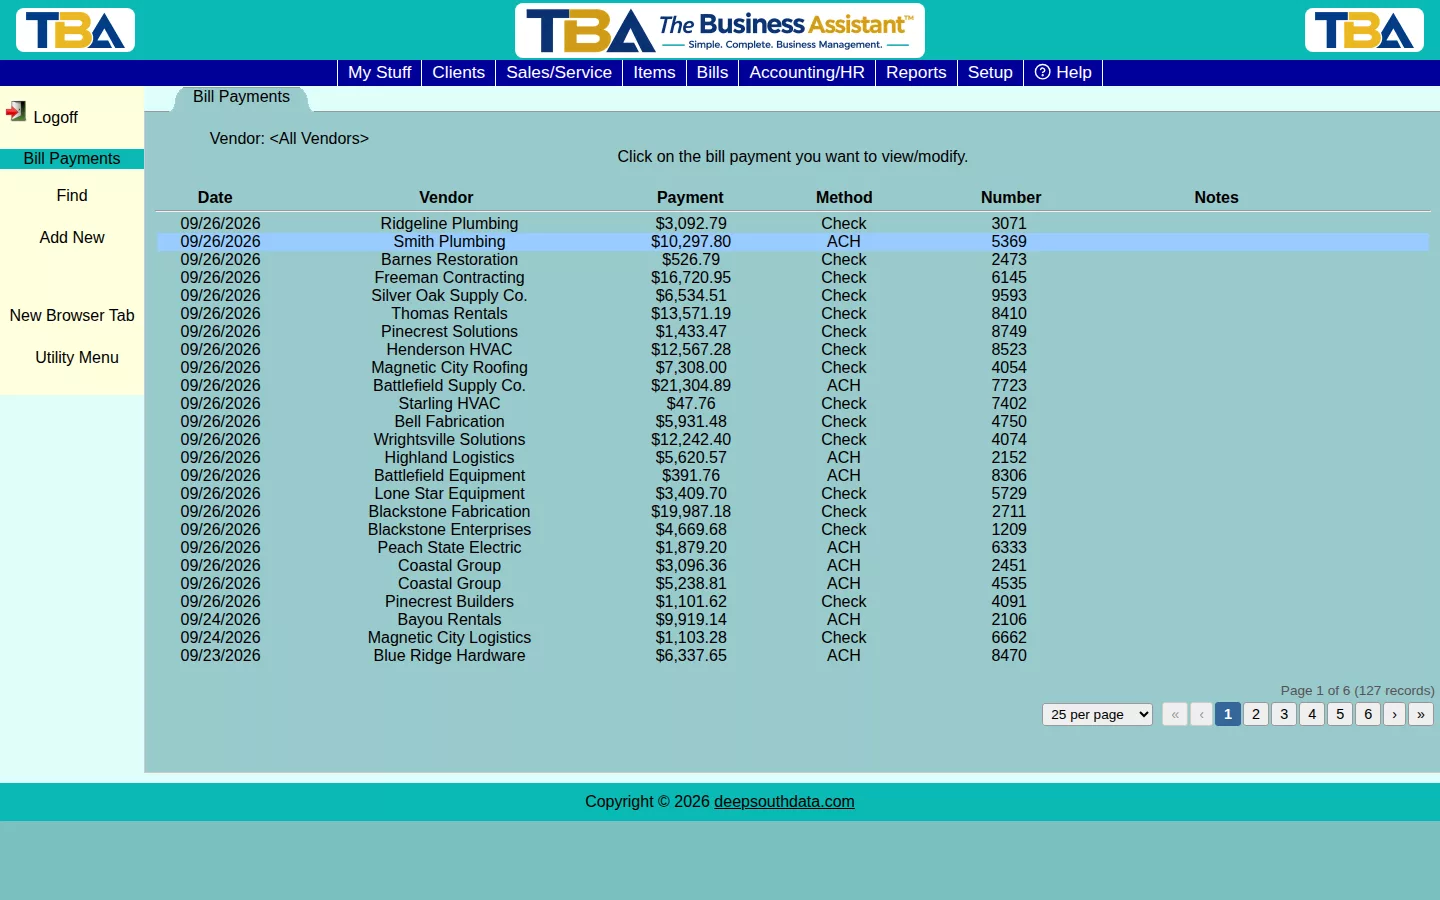
Open a vendor and click its Payments tab for that vendor’s payments, or choose Bill Payments from the main menu for everyone. Columns: Date, Vendor, Payment, Method, Number (check or reference number), and Notes. The sidebar has Add New and Find.
To find a payment, fill in any of Payment date from / to, Reference number, and Amount.
Paying Bills in Batch #
From the Bill list, Reload To-pay List opens the Bills to Pay dialog listing every open or partly paid bill. It can also open automatically when you visit the list (untick Show this dialog every time to stop that; the sidebar link always brings it back).
Reading the List #
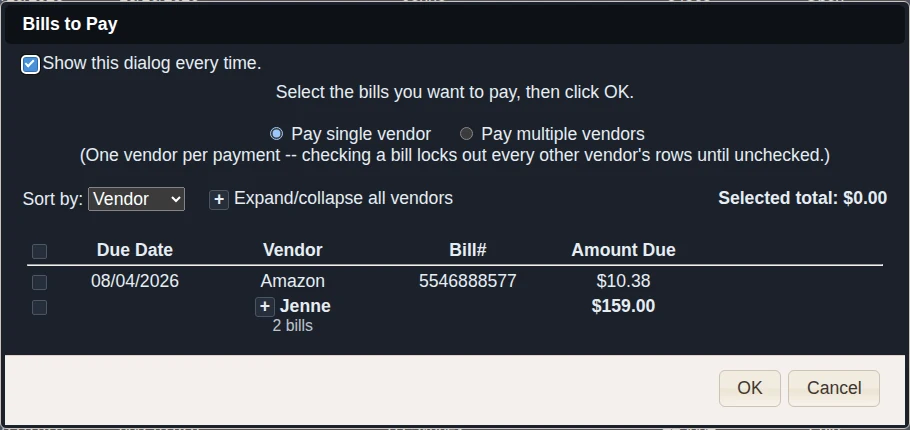
- Columns — Due Date, Vendor, Bill# (the vendor’s reference number), and Amount Due. Scroll inside the dialog when the list is long; the title and the OK / Cancel buttons always stay on the screen.
- Sort by — Vendor (the default) keeps each vendor’s bills together; Due Date shows one flat list, oldest first.
- Grouped by vendor — under Vendor sort, a vendor with two or more unpaid bills appears as one summary row: a +/− box, the vendor name, the count (3 bills), and the combined amount due. Click the box to show or hide that vendor’s individual bills. A vendor with a single bill shows only that bill and no box. Vendors start collapsed.
- Expand/collapse all vendors — the box next to the sort control opens or closes every vendor at once (shown only when some vendor has several bills).
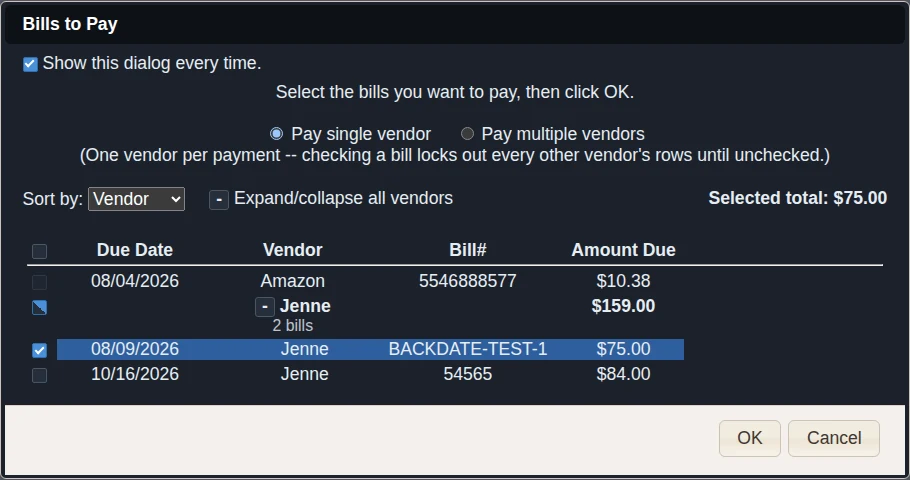
- Checkboxes — tick individual bills, or tick a vendor’s summary row to take all of that vendor’s bills (a half-filled box means only some are ticked). The box above the list selects everything. A collapsed vendor’s ticked bills still count.
- Selected total — adds up the amount due on everything you have ticked.
Choosing How to Pay #
- Pay single vendor — tick the bills to pay. Once you tick one, every other vendor’s boxes (including their summary rows) are disabled until you untick back to none. Click OK to open the payment form pre-filled with those bills, where you can adjust amounts before saving.
- Pay multiple vendors — a batch check run. Tick bills across any number of vendors, choose Pay from (the bank account) and the Starting check#. TBA pays each bill in full, one check per vendor with consecutive check numbers, then prints all the checks together. If any vendor has too many bills to list on a check voucher, TBA then offers to print a Remittance Advice page for those; load plain paper before you click Print Remittance Advice.
Paying a Single Bill #
Open the bill and click Pay Bill in the sidebar to pay just that one, pre-filled with its vendor and balance due.
The Payment Form #
- Vendor and Payment date.
- Payment total — the amount you are paying.
- Payment type — check, ACH, credit card, or Other (type a name for it).
- Pay from — the bank or credit card account the money comes out of.
- Check# — leave it blank to have TBA print a check, or enter the number of a check you wrote by hand. Account# is for payments that need a reference.
- Notes/Memo.
- The list of the vendor’s open bills shows each Bill date, Due date, Bill#, Notes, Original amount, Amount due, the Payment you are applying, and the resulting Balance. Tick a bill to pay its full amount due, or type a partial amount.
- Total applied to bills and Remaining amount to apply keep a running count.
If part of the payment isn’t applied to any bill, TBA asks how to handle it: apply it to the oldest bills, or leave it as unapplied credit with the vendor for a later bill. Click Save Changes to finish.
Credits and Prepayments #
- Unapplied credit — if you previously overpaid a vendor, TBA tells you when you start a new payment, and you can apply that credit to open bills instead of paying new money.
- Vendor credit — if the vendor has issued you a credit (a bill marked This is a Vendor Credit, including the credit TBA creates when you record a credit memo for a vendor return), a banner appears with an Apply this credit button that applies it to open bills with no payment created.
- Prepay a PO — in the sidebar, lists the vendor’s purchase orders so you can pay a deposit before the bill arrives. Click a PO to add a prepayment line. See Purchase Orders.
Printing and Voiding #
- Print/Download — prints the check or a PDF of the payment.
- Void Payment — reverses the payment’s accounting entry and un-applies it from every bill. Cannot be undone.
Related #
For a payment with no bill, use Quick Payment. To match payments to your bank statement, use Reconciliation. Vendor balances are shown on AP Aging. If a bill’s goods were sent back, see Vendor Returns.
On a Phone #
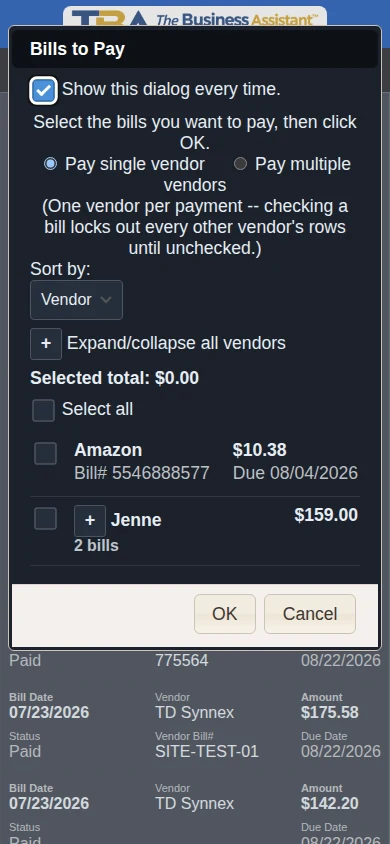
The Bills to Pay dialog shows each bill as a card (vendor and amount due on top, bill number and due date below) with a larger checkbox; vendor summary rows show the name, bill count, and combined amount. See Using TBA on Your Phone.


