
This is a guided tour of paid holidays, manager approval of leave, pay plans, benefits and labor burden, and posting a pay run to the G/L. Follow the steps in order on a company that has employees with hours (the demo company works well); each step says what you should see. It builds on Pay Runs, Pay Codes and Leave Requests.
Use a draft pay run. Steps 1, 4 and 5 change a pay run’s lines, so work on a run in Draft status (HR/Payroll > Pay Runs lists them). Approving a run locks its period; you can Reopen it afterwards (unless it has been exported).
1. Paid holidays #
- Go to Setup > HR > Company Holidays.
- Click Add a holiday, enter a date inside your draft pay run’s period, a name, and 8 in Paid hours (it shows as 8.00). Click Save Changes.
- Open the pay run and click Recalculate.
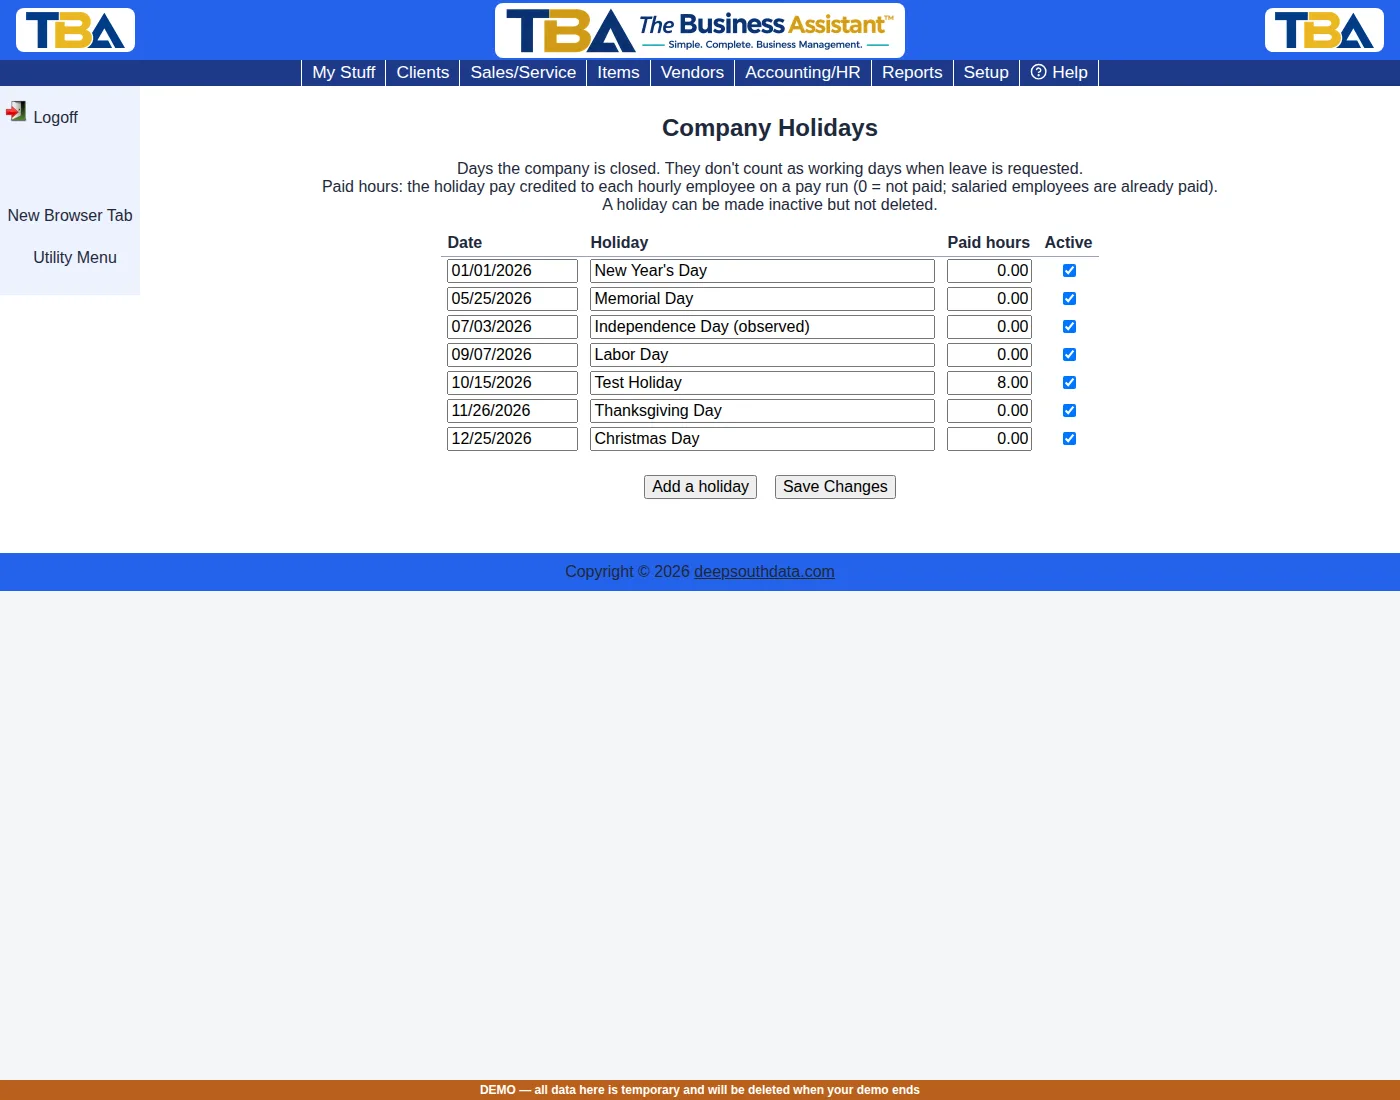
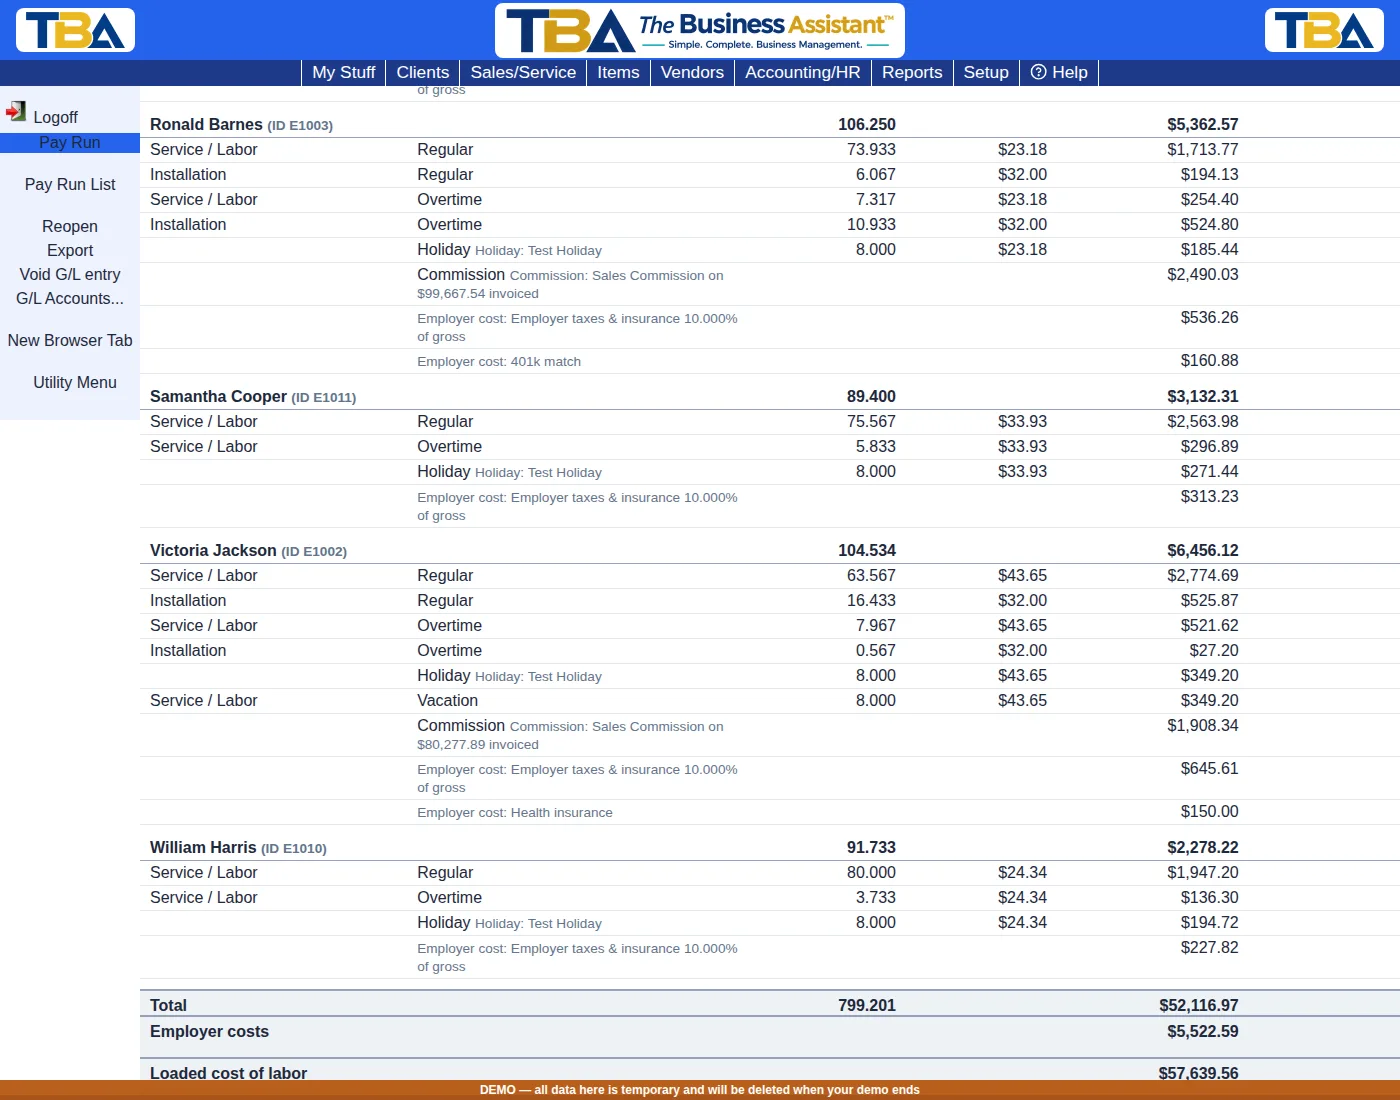
You should see: every hourly employee gets a line on the Holiday pay code for 8.000 hours at their hourly rate, with the note “Holiday: <name>”. Salaried employees get nothing extra (they are already paid). A holiday with 0 paid hours changes nothing. If you have no active Holiday pay code the run warns you instead.
2. Unpaid leave #
Hours on a pay code in the Unpaid leave category show on the pay run with a rate and amount of $0.00, and the Payroll Summary leaves them out of an hourly employee’s gross pay.
3. Managers and leave approval #
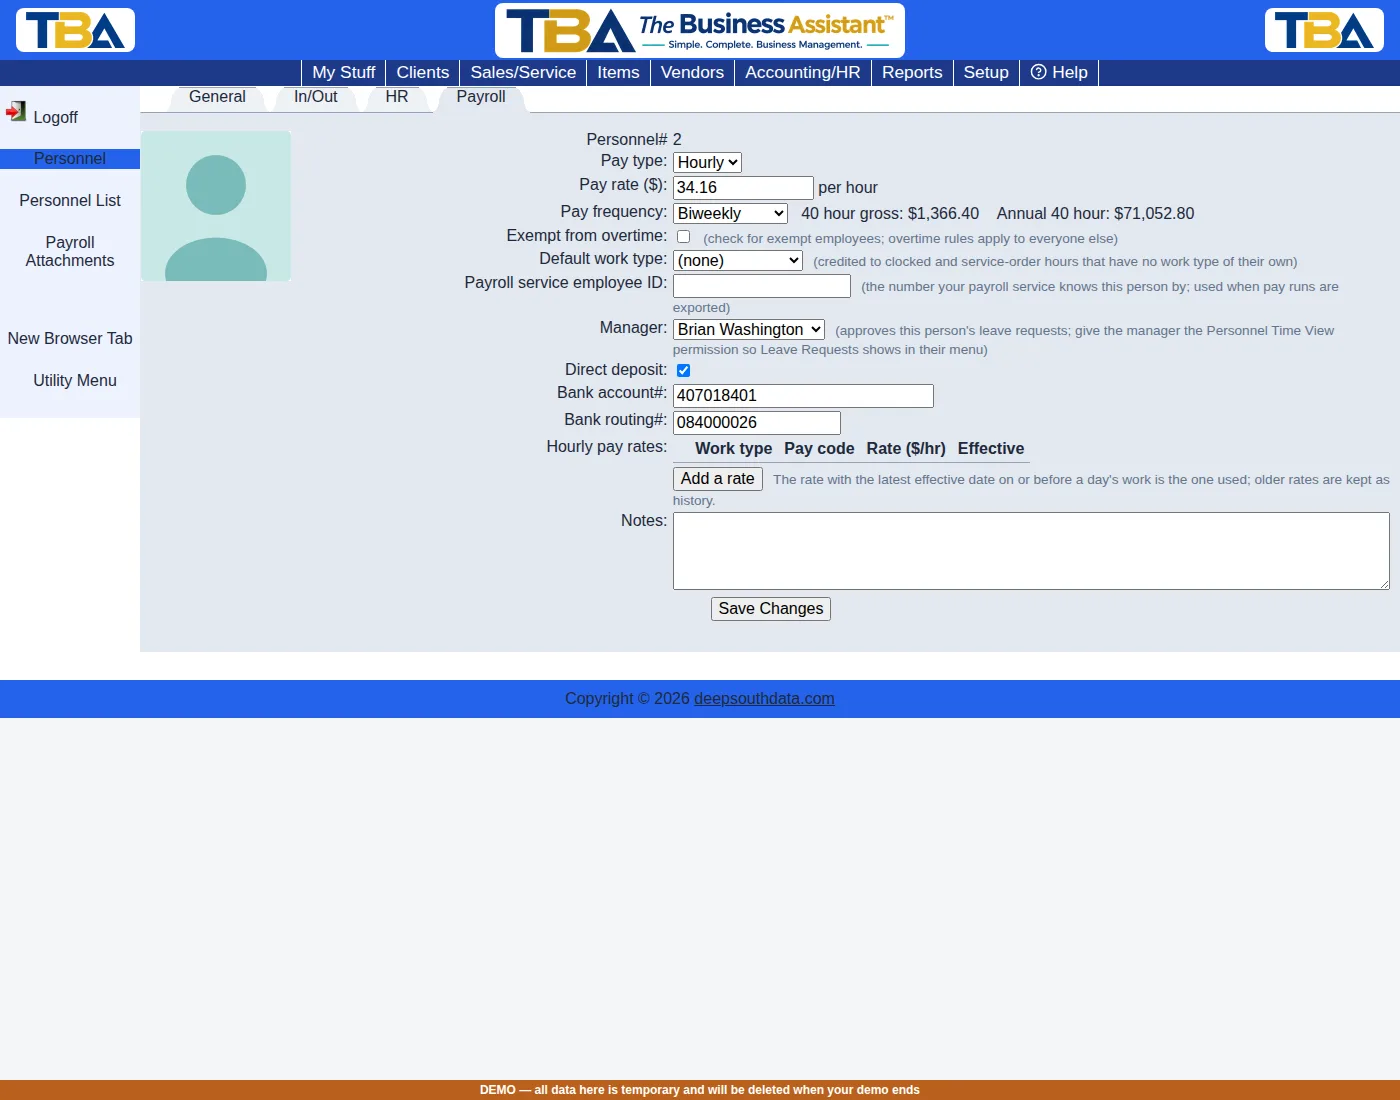
- Open an employee’s record and its Payroll tab. Pick a person in the new Manager list and save. Reopen the tab: the manager is still there.
- Give that manager the Personnel Time View permission (Users and Permissions) so Leave Requests appears in their menu.
- Sign in as the manager. Leave Requests now shows requests from the people they manage, with Approve and Deny buttons. They can request leave for those people, cancel their requests, and request for themselves when self-service is on, but they can never approve their own.
- Payroll administrators still see and decide every request.
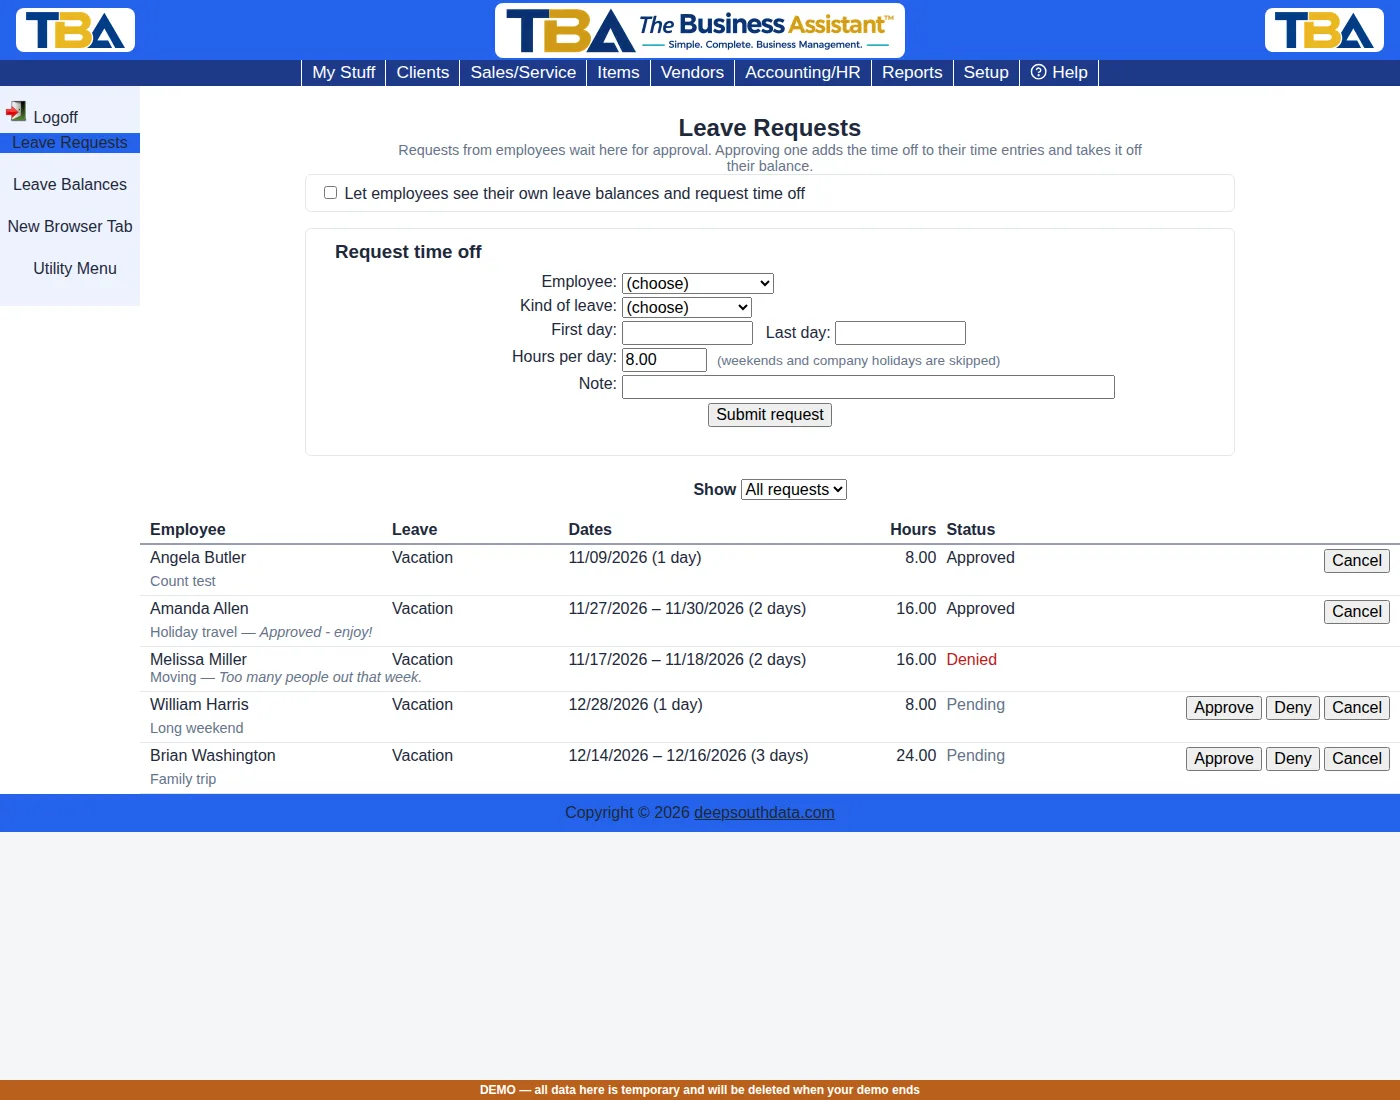
You should also see: when a request is approved or denied, the employee is emailed the decision (and any note) at the first email address on their record. If they have no address, or no mail server is set up, the decision still goes through. (Demo companies only send email to the address they signed up with.)
4. Pay plans #
- Go to Setup > HR > Pay Plans and click Add a pay plan.
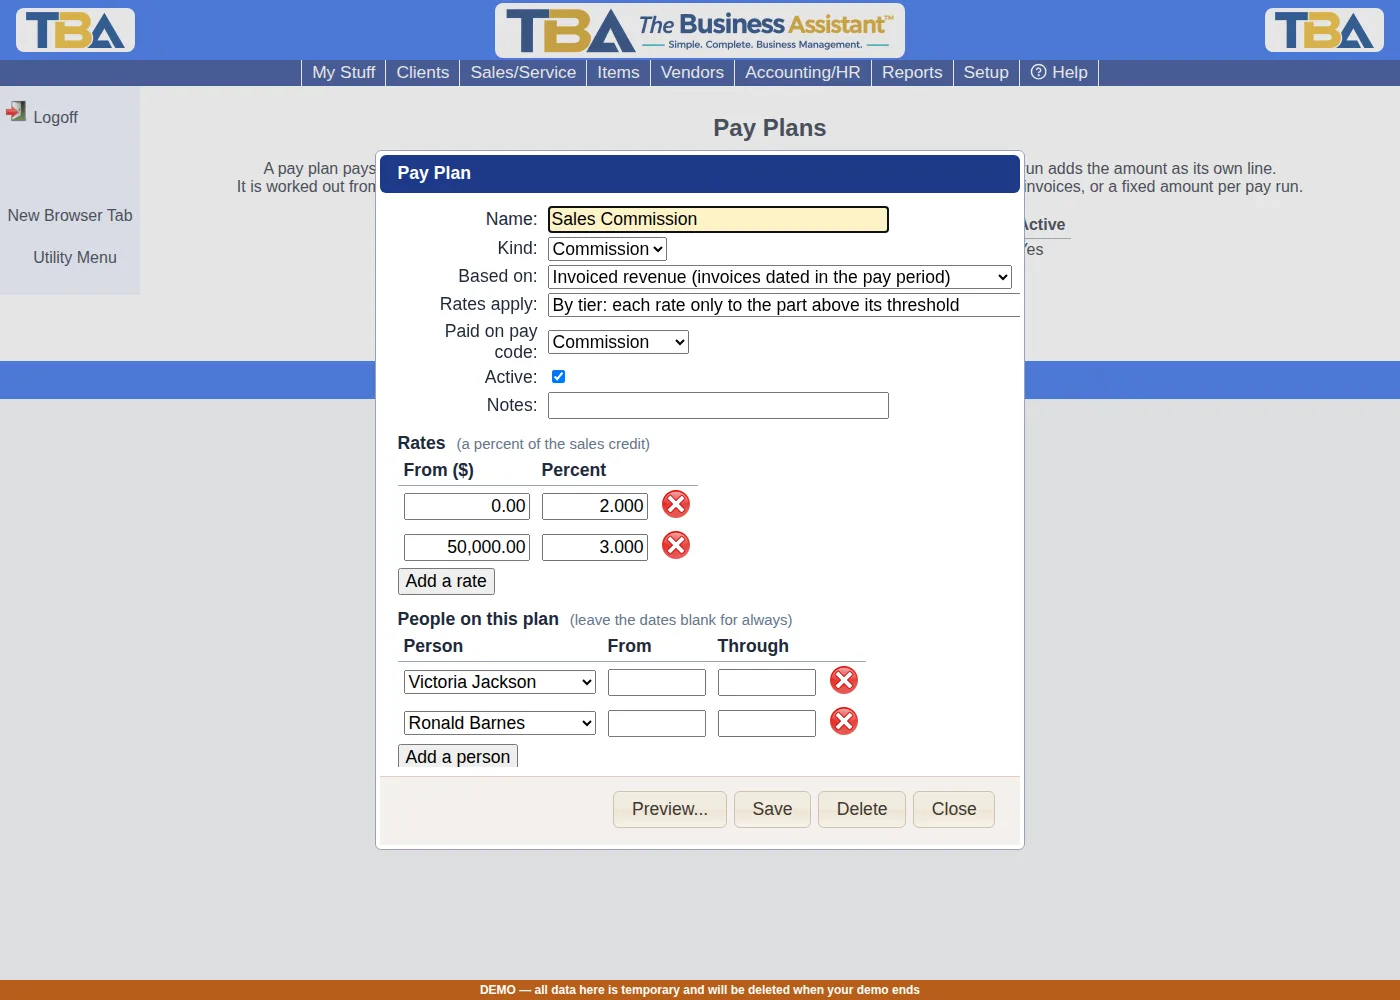
- Name it “Sales Commission”, kind Commission, based on Invoiced revenue, rates apply By tier, paid on the Commission pay code.
- Rates: From 0 at 2 (percent); click Add a rate: From 50000 at 3.
- Click Add a person twice and choose two salespeople (people who appear on the Sales by Salesperson report). Click Save.
- Reopen the plan and click Preview…, set the dates to your pay run’s period and click Show.
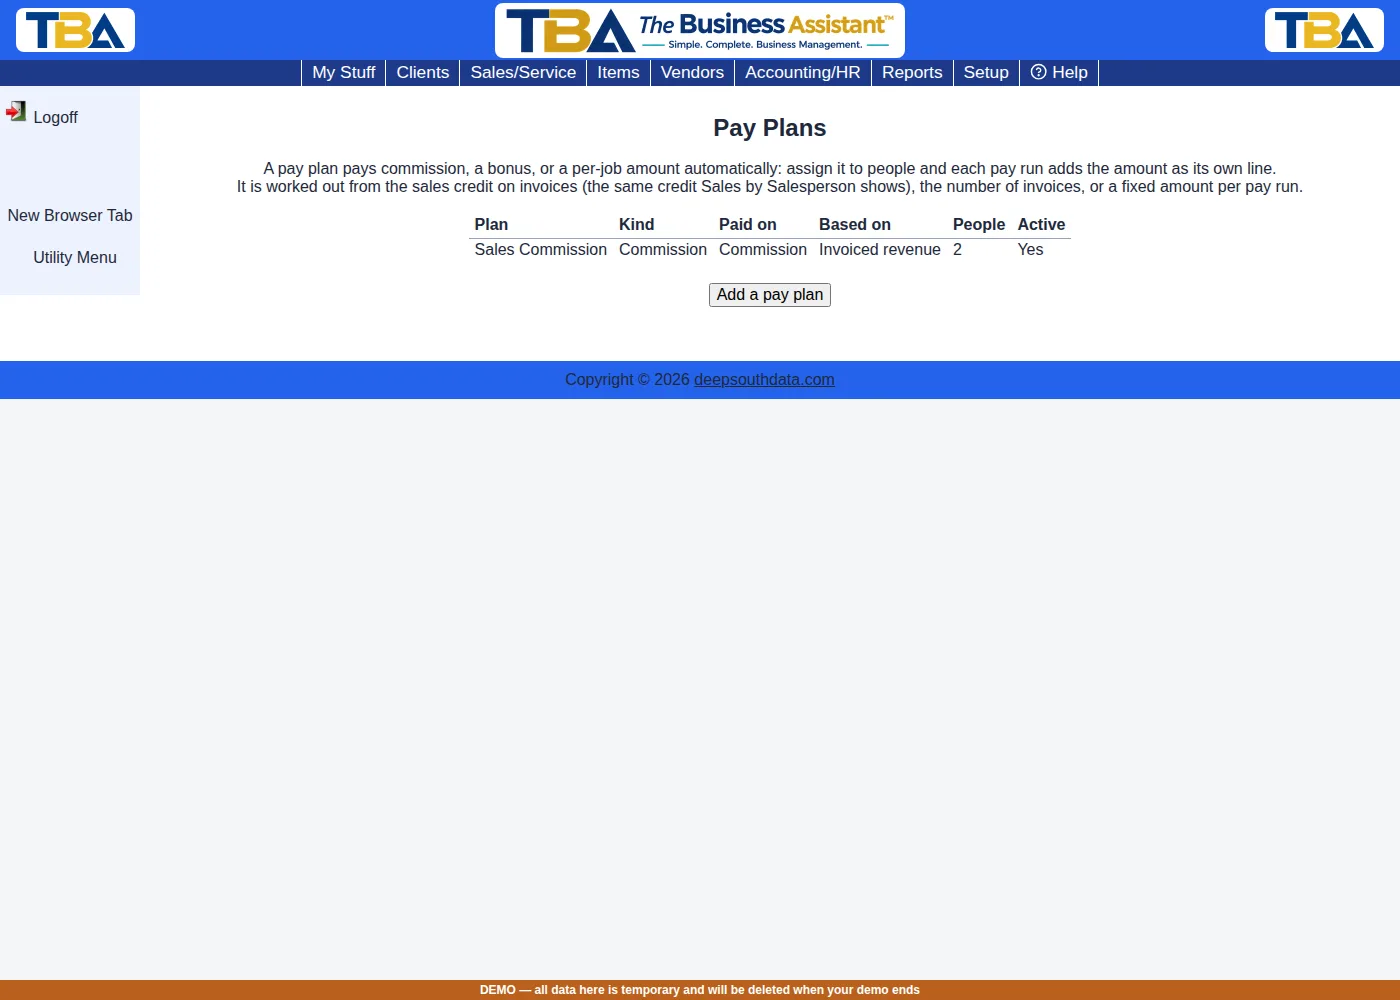
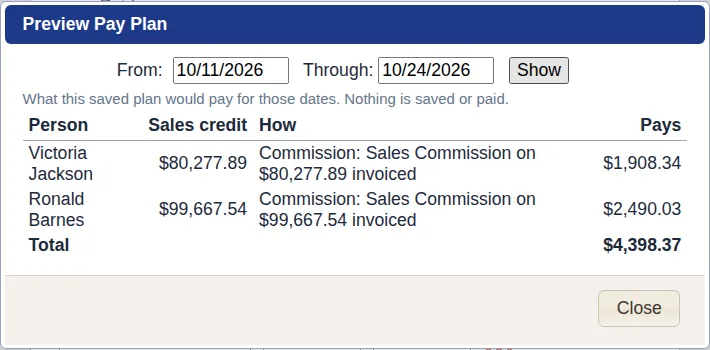
Check the math: for sales credit of $80,277.89 the plan should pay 2% of the first $50,000 ($1,000.00) plus 3% of the rest ($908.34) = $1,908.34. Compare each person’s “Sales credit” in the preview with the same dates on Sales by Salesperson: they should match. Change Rates apply to retroactive and preview again: the amount becomes 3% of the whole credit.
Now open the pay run and click Recalculate: each person gets a Commission line for the same amount as the preview, and their gross rises by it.
5. Benefits and labor burden #
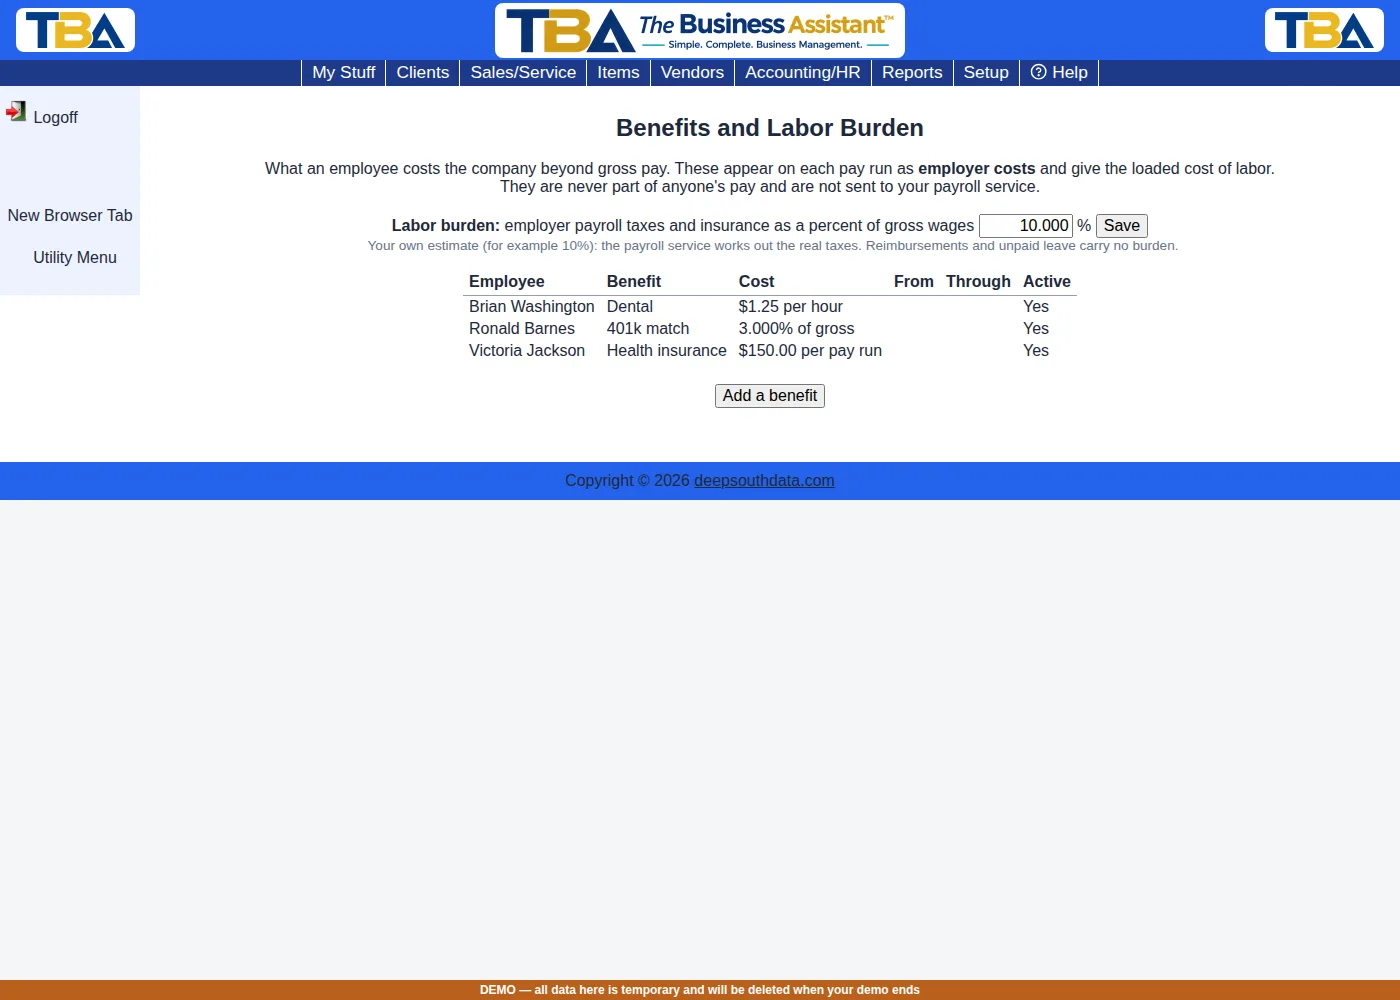
- Go to Setup > HR > Benefits & Burden. Type 10 as the labor burden and click Save.
- Click Add a benefit: a salesperson, “Health insurance”, a flat amount of 150.00 each pay run. Add another for someone else: “401k match”, a percent of gross wages, 3.
- Open the pay run and click Recalculate.
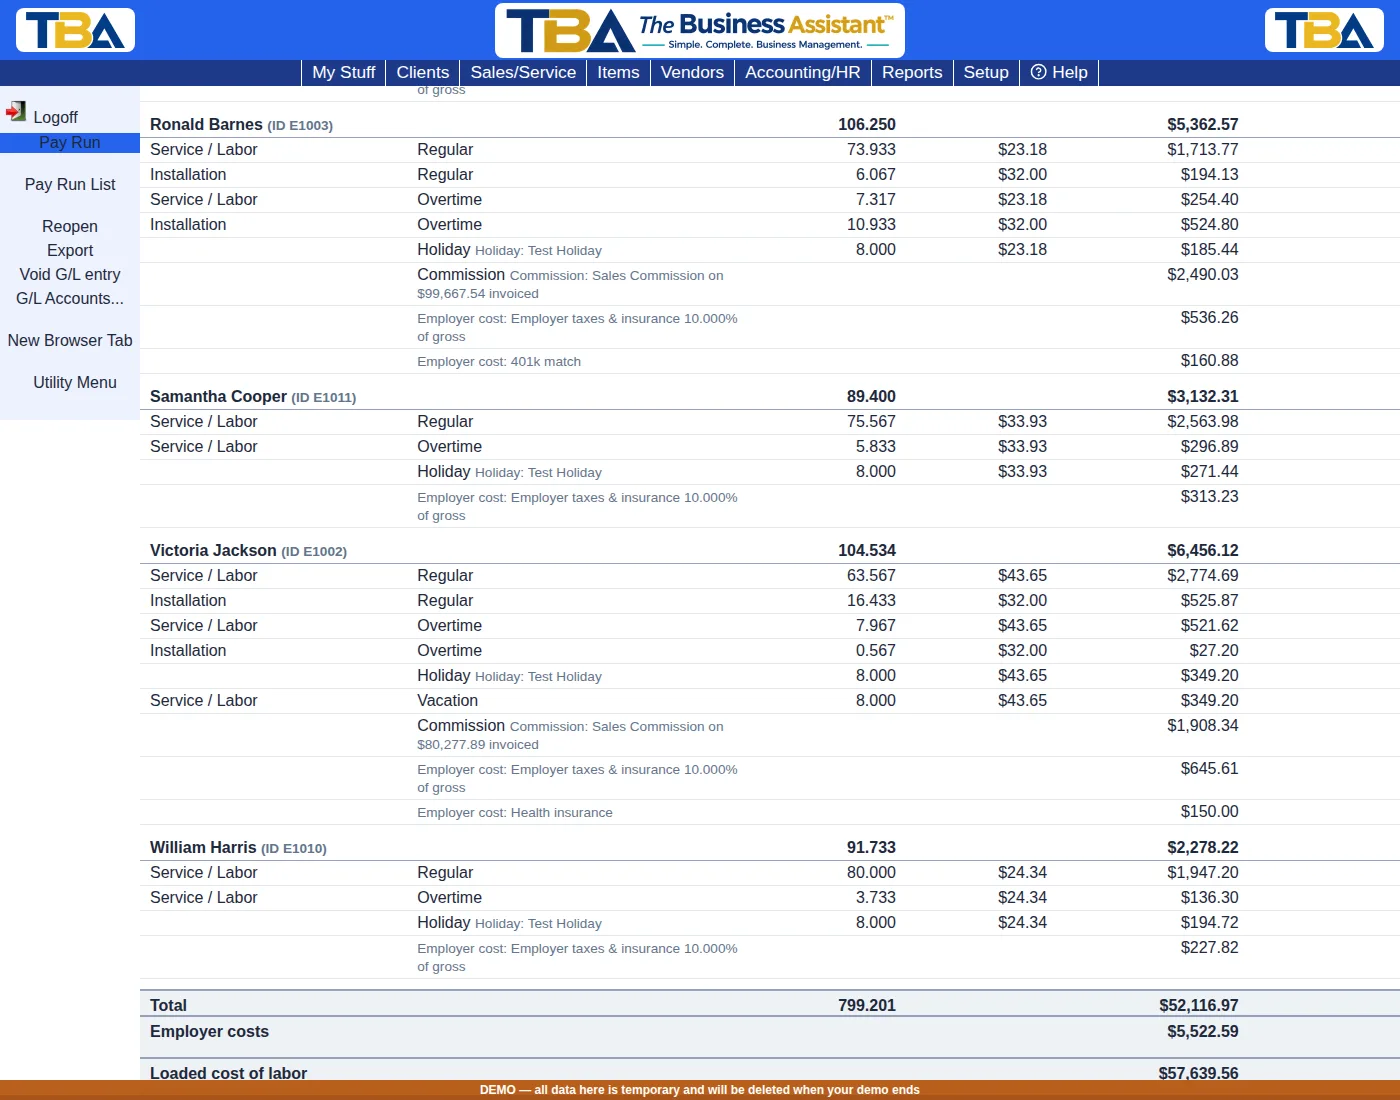
You should see: under each employee a grey line “Employer cost: Employer taxes & insurance 10.000% of gross” for 10% of that person’s gross (commission and holiday pay included), plus the benefits. At the bottom: Total (gross pay, unchanged by employer costs), Employer costs, and Loaded cost of labor (the two added together). Add a line by hand to someone: their employer costs update straight away.
6. Post the pay run to the G/L #
- On the pay run, click G/L Accounts…. Choose a Wages expense account, a Payroll liabilities account (different), and, to include employer costs, an Employer costs expense account. Save.
- Click Approve (lock the period), then Post to G/L.
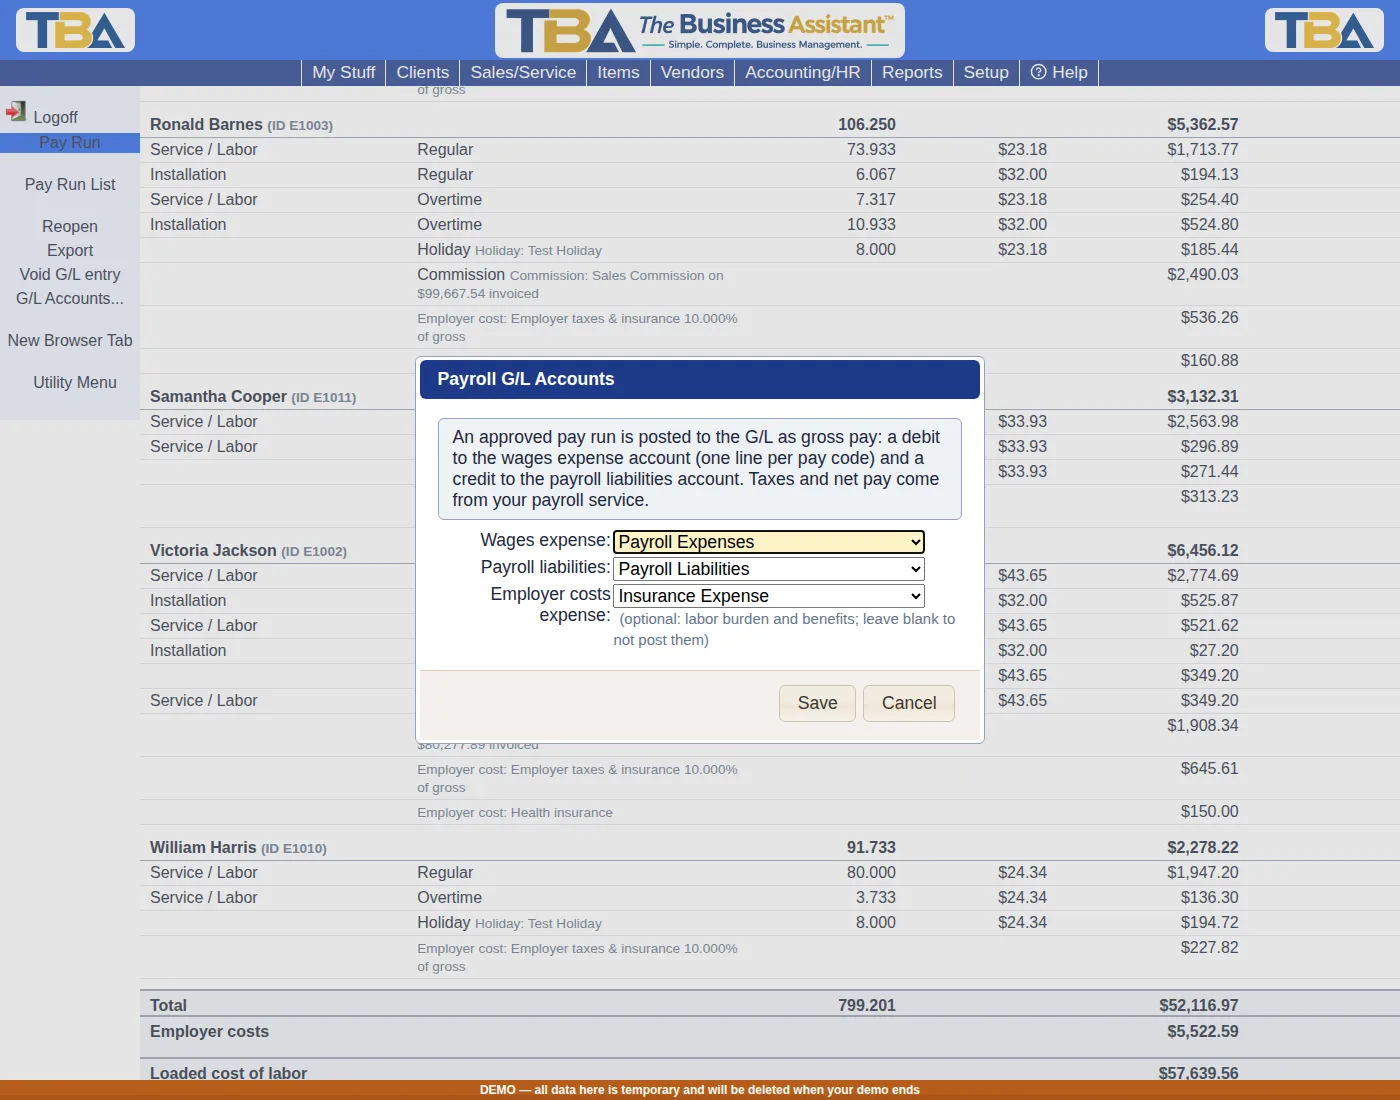
You should see: “The pay run has been posted to the G/L (entry #…)” and, if you chose an employer costs account, the employer costs total. Open the entry in the General Ledger: wages are debited one line per pay code (Regular, Overtime, Holiday, Commission …), the payroll liabilities account is credited for the gross total, and the employer costs are debited with their own credit to payroll liabilities. Debits equal credits. The entry’s source reads “Pay Run”.
- Void G/L entry posts a reversing entry; you can then post the run again.
- A run can only be posted once at a time, and only after it is approved.
- If the check date is in a period that doesn’t exist yet, you are offered to create the fiscal periods.
Related: Pay Plans, Benefits and Labor Burden.


